Finding Lane Lines on the Road
Term 1 Project 1 Udacity Self Driving Car Nanodegree
This is the first project in the Self Driving Car Nano Degree. The aim is to clearly mark road lane lines in test images and then videos. Personally it marks the first milestone in my commitment to return to programming after more than a decade outside programming. I had done a basic Learn Python course a month before but this was really my first substantial Python project. There were also extra programming libraries in addition to basic Python for image processing, Numpy , Matplotlib and OpenCV in this project. All of these libraries were new to me. I was wondering if I bit off more than I could chew with this course but the build up to this point was great, excellent online material, videos, labs and Slack Channels. So with some trepidation I dove into the project.
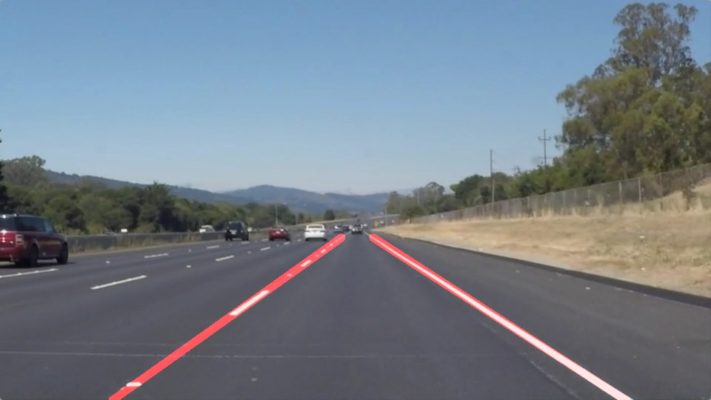
This is what we are aiming for, an example image of what they want given to us as part of the project. Nice and thick coloured lines overlaying the road markings.
A series of steps called a pipeline were described to us, to process the image, find road markings and then overlay the thick lane lines as shown. When we get it working on one image we feed the pipeline video footage and make adjustments as needed.
There are 3 videos. 2 are not too hard but there is one “challenge video” that is so hard for a beginner that you don’t need to get it working to pass at this point. But the challenge video is the starting point for a follow on project called “Advanced Finding Lane Lines” and it has to be done right at that point.
This was my first attempt on a video. I know what you are thinking, so close right? Well I did get outlines of road marking in red/pink, that was good but obviously the lines joining them all together are all over the place.
I assumed the lines found from the pipeline would be ordered from the top of the image to the bottom and I could connect them by joining the end points. So what went wrong? 2 big things. The vertical coordinate (y-value) is accidentally zeroed on every first point in each pair. That’s why they are all connected to the top of the image. I could have fixed this bug but there is more. The first pair is set to the top left (0,0) co-ordinate. I did this as I set some initial values. The second pair connected to the first is not at either the top or bottom of the road. This means even if I fix the bug connecting the lines end to end will need some kind of sorting process to arrange them conveniently. I decide to try something simpler. When in doubt simplify!
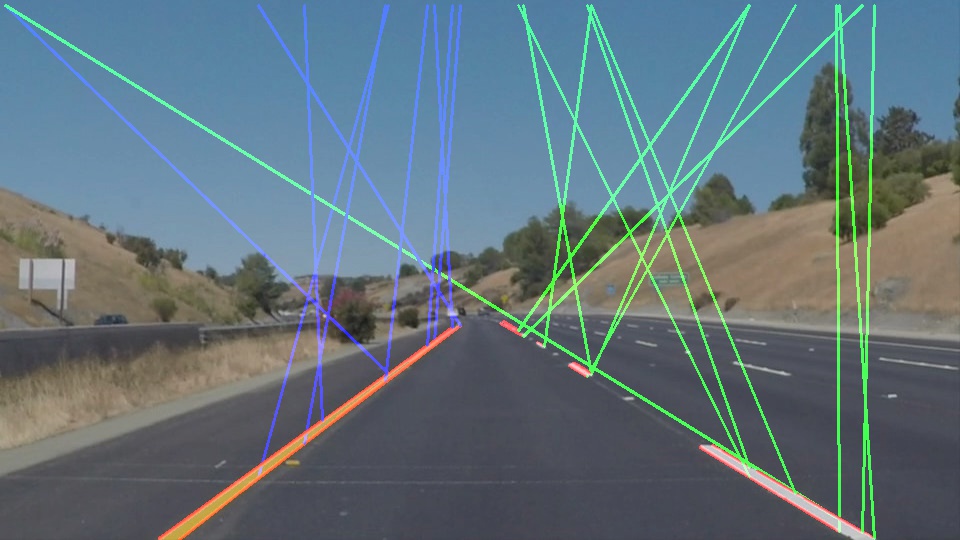
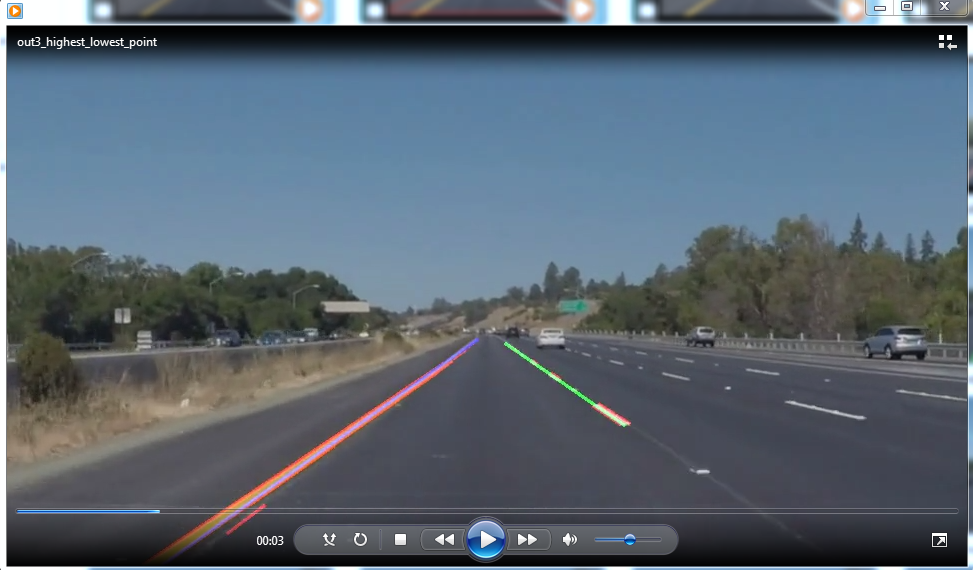
Simple is good or at least better than the last attempt. So here you can see that lane lines were detected and marked in red/pink and there are lines going from the top to the bottom of the left and right lanes (blue and green). There are a couple of things that need improving. The blue and green lines need to be thicker which is easy to fix.
But less easy to fix is the question as how this will work when there is a curve in the road. I was thinking maybe I could do 3 or 4 line sections to allow for a curve or something like that. So I ran the same pipeline on the challenge video, which has a curve in the road.
.
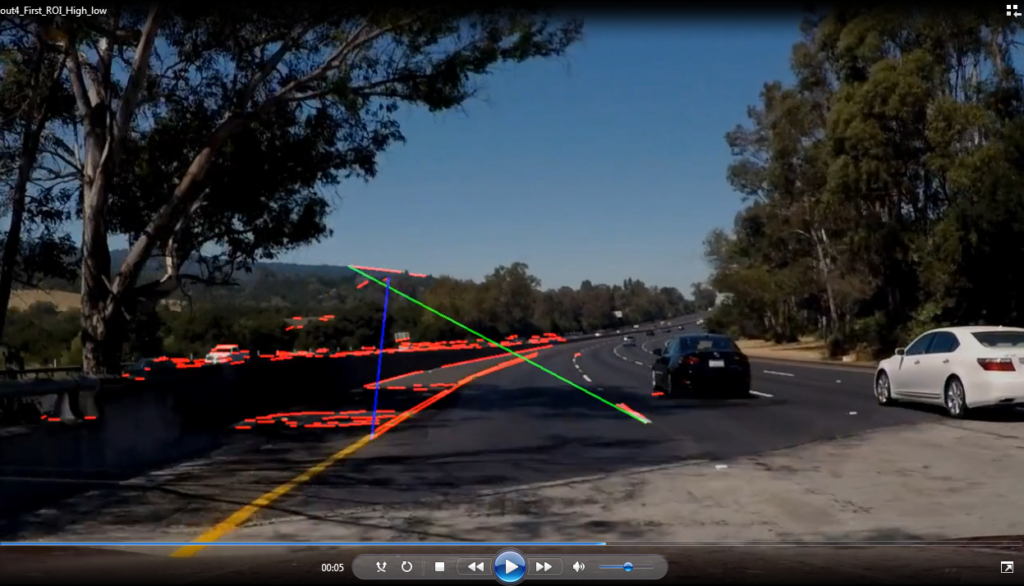
Well, it could be aliens with laser guns are hiding up there in the trees and shooting down on the road or could be my ROI is way off. What’s a ROI?…glad you asked.
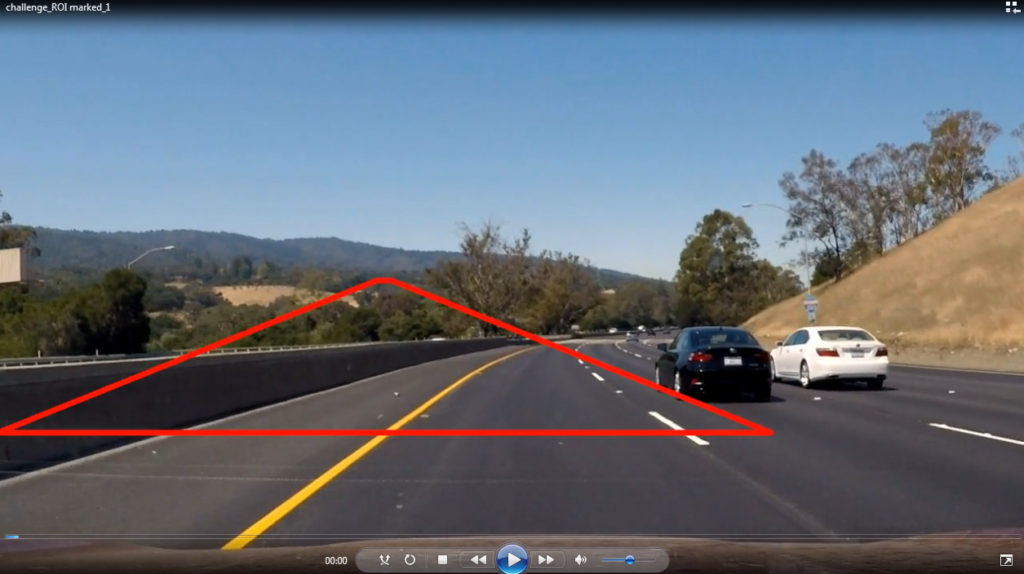
Part of the process was to focus on just part of the image we called this a Region Of Interest or ROI for short. It is supposed to be a triangle covering center road lane. It is shaped in proportion to the size and shape of the overall image.
So whats going on here?
I modified the pipeline to just draw the ROI and not do anything else so I could get a clear look at what was happening. Clearly the ROI was way off. I spent quite a while adjusting the ROI but it seemed like the original values should have worked. This is a great example how a tea break can solve any problem! I took a break and the answer was right in front of me. I was making the ROI with proportions but not of the video. Earlier in the program we used a variable called “img” to keep track of the test still image. Later on we were supposed to change to a variable called “image” to keep track of the videos. I was still using the variable “img”. This worked for the first video because it was the same size as the test image but the challenge video was a different size and so the ROI was off
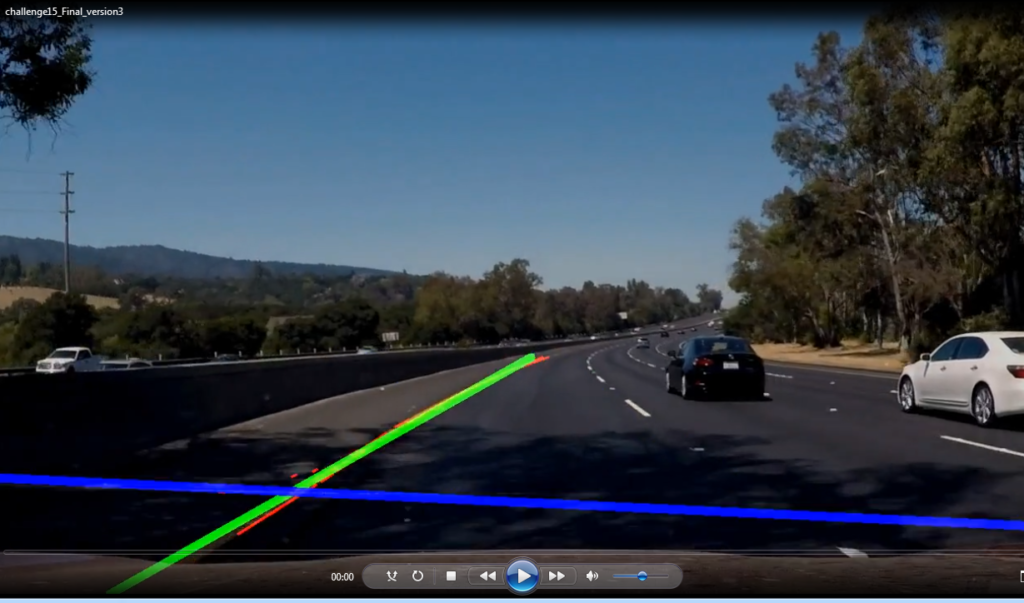
I fixed the ROI and tried again. I got results like this one crazy lines but worse than that. The program completely crashes after a couple of seconds. Later I realise that the challenge video has lots of shade and colour lines on the road and this throws off the whole pipeline. Also some times there are no lines detected and this causes a crash. I conclude that I need a new approach and decide to see what people are saying on the Slack channel. There is a tutorial on youtube so I watch it and an instructor from Udacity suggests to divide the lines into left and right sides by the positive or negative values of their slope and to average the center points on each side and average the slopes on each side to generate lines that should cover the lanes. So off I go to try that.
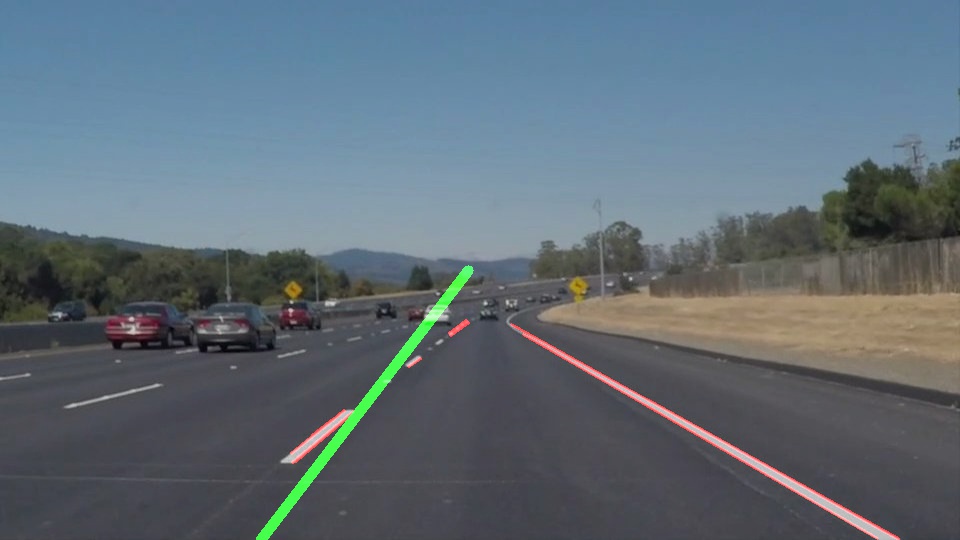
This is where I get to after the tutorial advice. The slope is off and the line too long but its progress. I didn’t understand at this point why the slope of the line is wrong.
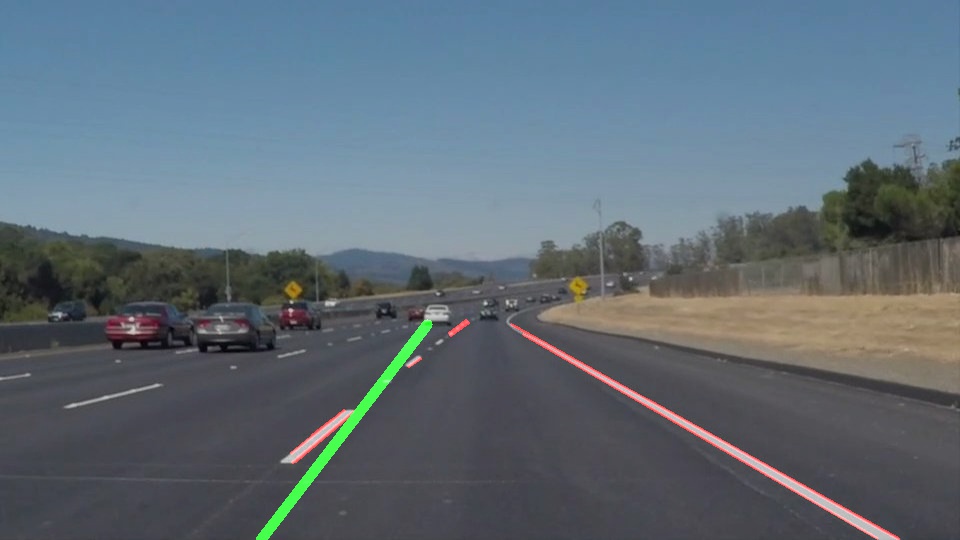
I trim the line to the correct length in proportion to the image size but still I can’t see what is wrong with the slope.
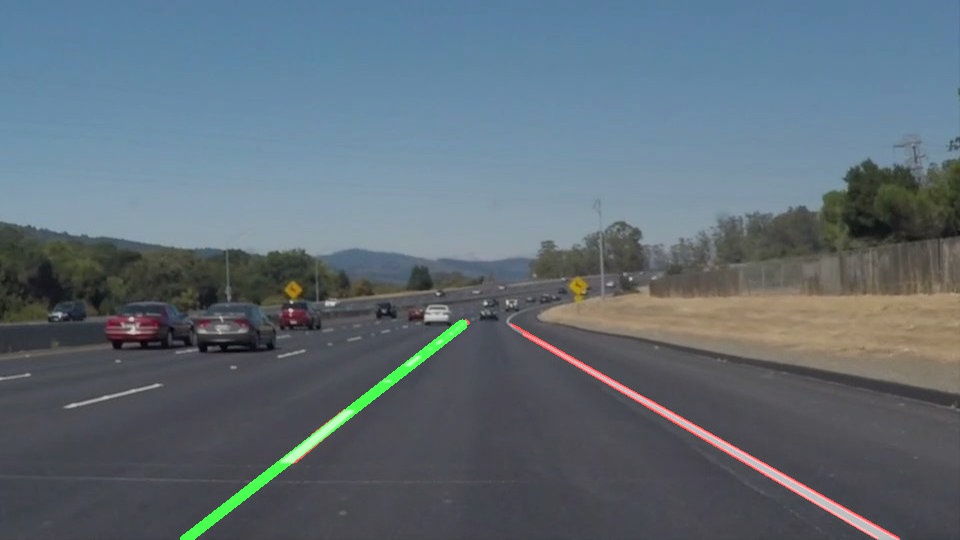
After many times reading the exact problem and not seeing it I do the only thing I can do. I question and check every single assumption. The slope is wrong so I check the formula for the slope of a line. A formula I had not used in many years but I was so sure it was correct. It turned out I had my X’s and Y’s the wrong way around in the formula and once that was fixed it was fine.


Functional Safety
Path Planning
PID
Particle Filter
Unscented Kalman Filter
Kalman Filter

Vehicle Detection
Behavioral Cloning
Advanced Lane Lines

Traffic Sign Classifier
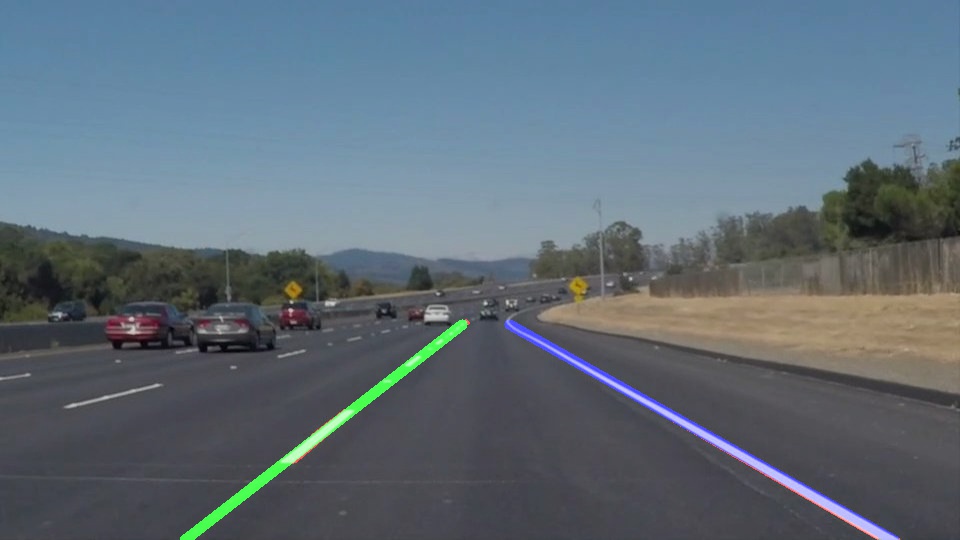
I did the same for the other side and now I am quite pleased with myself. At this point I had enough to pass the project as the challenge video was a lot harder and not a requirement at this stage. Passing the Challenge Video could wait for the Advanced Finding Lanes Project if necessary. For now I want just to see how it works on the challenge video.
Looks good but only for 2 seconds and the program crashes. I try many subclips and it never works beyond a couples of seconds. I realise finding no lines causes the program to crash and I try various programming techniques like using “try” and “except” statements and using default values. Then I get the dreaded “Nan error”. Nan means not a number….hmmm how many is that exactly, less than zero?
If you want to see the details of the project all the code, a much more detailed PDF report for the project, feedback/grading from Udacity and lots of experimental images and video outputs are all on my GitHub page for this project. There are lots of comments in the code to show what I tried and what I was thinking at the time. You might find some amusing “notes to self” in there.
